The SmartUi Remote Verification Station allows users to intuitively process invoices. Besides verifying the data, the station enables its operator to process problem batches or documents, correct assembly errors, apply data rules, and check batches for integrity. The Verification Station can work in a local and a remote network (via the Internet). Authorization is carried out using a login and a password. For more details, please see Remote Verification Station.
This guide contains two parts.
Part 1: Step by Step Download & Installation Instructions
Part 2: Configuration and connecting to the SmartUi cloud
Note: To complete the installation, a user name and password must be created by the SmartUi team for you and the team. Please get in touch with SmartUi if your username has not been created.
Note: You will need administrative access on your PC to install this program. Please speak to your IT if you have any trouble installing it.
Part 1: Step by Step Download & Installation Instructions
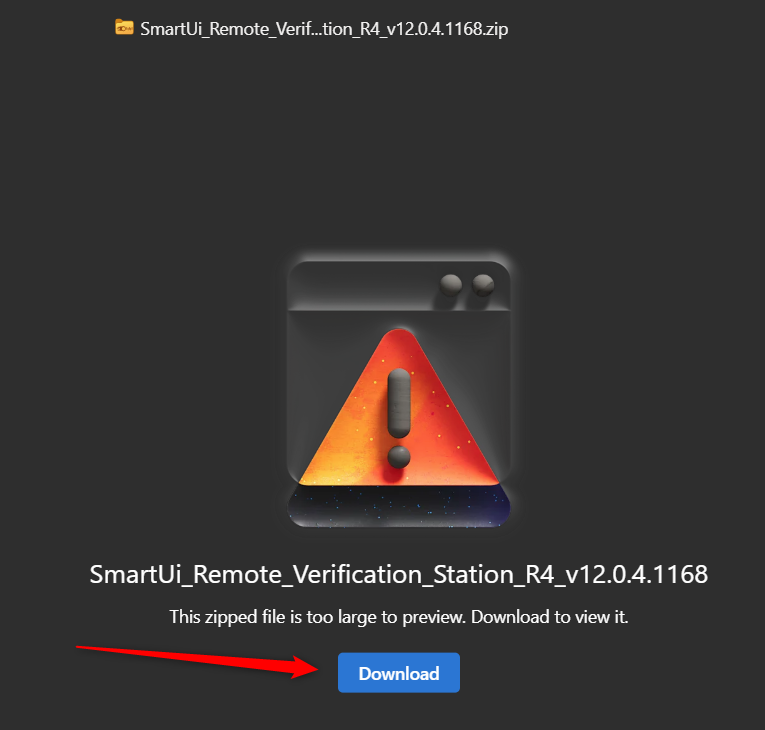
- Download the Installer from here:
Download Link: SmartUi Remote Verification station installer - Once downloaded, go to the folder containing the zip file
- Right Click on the file and select "Extract All."
- Right Click on the file and select "Extract All."
- Press "Extract"

- Open the Extracted folder and run(double click) "Verification Station x64."
- "Accept" the terms & Press "Next."
Insert Username and Company (Note it does not matter if these details are incorrect)
- Press Next


8. Press "Install."

9. Wait for the install to finish

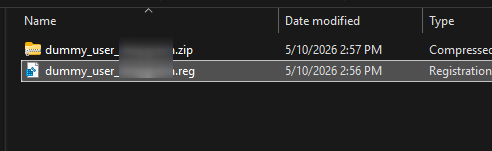
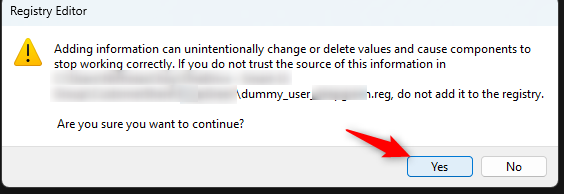
10. Once Installation is complete, download an unzip the registry file included in the email. Run the Registry file to create a dummy user (temporary fix for a known issue).
Important Note: Run as Local User (not as the Administrator)
11. Once the above step is completed:
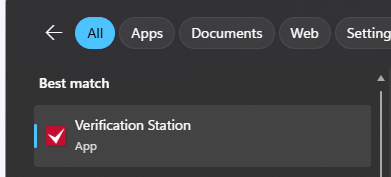
- Go to the windows start menu.
- Launch Verification station
Part 2: Configuration and connecting to the SmartUi cloud
Note: the SmartUi team must create a user name and password before proceeding to the next step. Please get in touch with SmartUi if your username has not been created.
- Go to the windows start menu.
- Launch Verification station

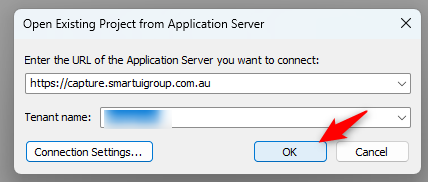
- Select “Browse from Server”
- Insert the following information
- URL: https://capture.smartuigroup.com.au
- Tenant name: <<Please ask your SmartUi representative for the tenant name>>

- PRESS “CONNECTION SETTINGS”
- Check to ensure the below details are shown indicating a test user is temporary set.
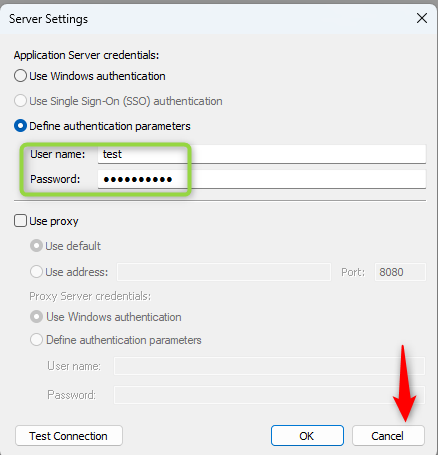
- Press Cancel to go back to Previous screen
- Press OK to connect
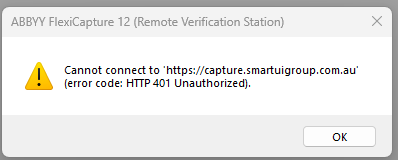
- An expected Error screen will show, click OK, and then enter your username/password that has been provided to you.
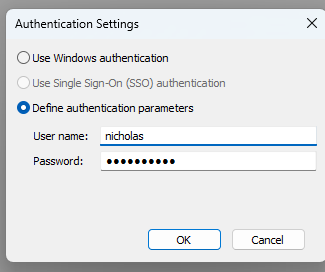
- Note: The above needs to be done only once.
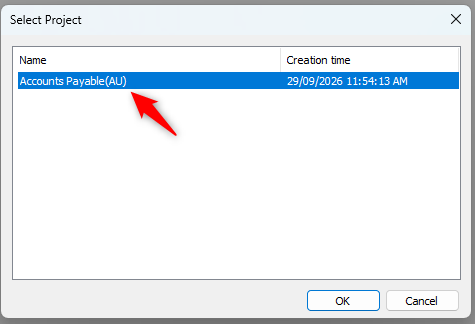
- You will arrive at the following screen, and the setup is complete. Click on OK to select the Project
 Installation complete.

Note: the automatic mode of opening the first available invoice is enabled by default. You can turn this off by clicking  or Task → Automatic Task Receive.
If you have any issues, don't hesitate to get in touch with support@smartuigroup.com.au.
Was this article helpful?
That’s Great!
Thank you for your feedback
Sorry! We couldn't be helpful
Thank you for your feedback
Feedback sent
We appreciate your effort and will try to fix the article